Removals inventory photos: make a dated, room-by-room photo inventory before you start packing, and keep receipts or valuations with those images. Which? guidance backs a room-by-room list with high-value items kept separate, and council checklists point the same way. The result is evidence for your insurer, a more accurate removals quote and proof of condition.
TL;DR:
- Photograph each important item from multiple angles, including existing damage, labels, serial numbers, and box contents, then pair images with receipts or valuations.
- Record each item’s count, condition, and declared value, and send details of antiques, artwork, pianos, and fragile goods before the mover finalizes its quote.
- Keep original photos with metadata in one secure cloud folder and a separate backup, alongside matching receipts, valuations, and guarantee cards.
- Tenants should keep belongings photos separate from a dated property condition record, because move out inspections may lead to repair costs deducted from the deposit.
- Start organizing at least two months before moving, then update the inventory after decluttering and again just before packing begins.
Table of Contents
- What should you photograph for a moving inventory?
- How do you build a room-by-room photo inventory and item list?
- How should you store, label and preserve your photos?
- How do photos help with insurance claims and your removals briefing?
- What changes if you rent?
- When should you take your inventory photos?
- Our view: a clear photo set saves everyone time
- How can we help with your move?
- FAQ
- Sources
What should you photograph for a moving inventory? Part of removals inventory photos
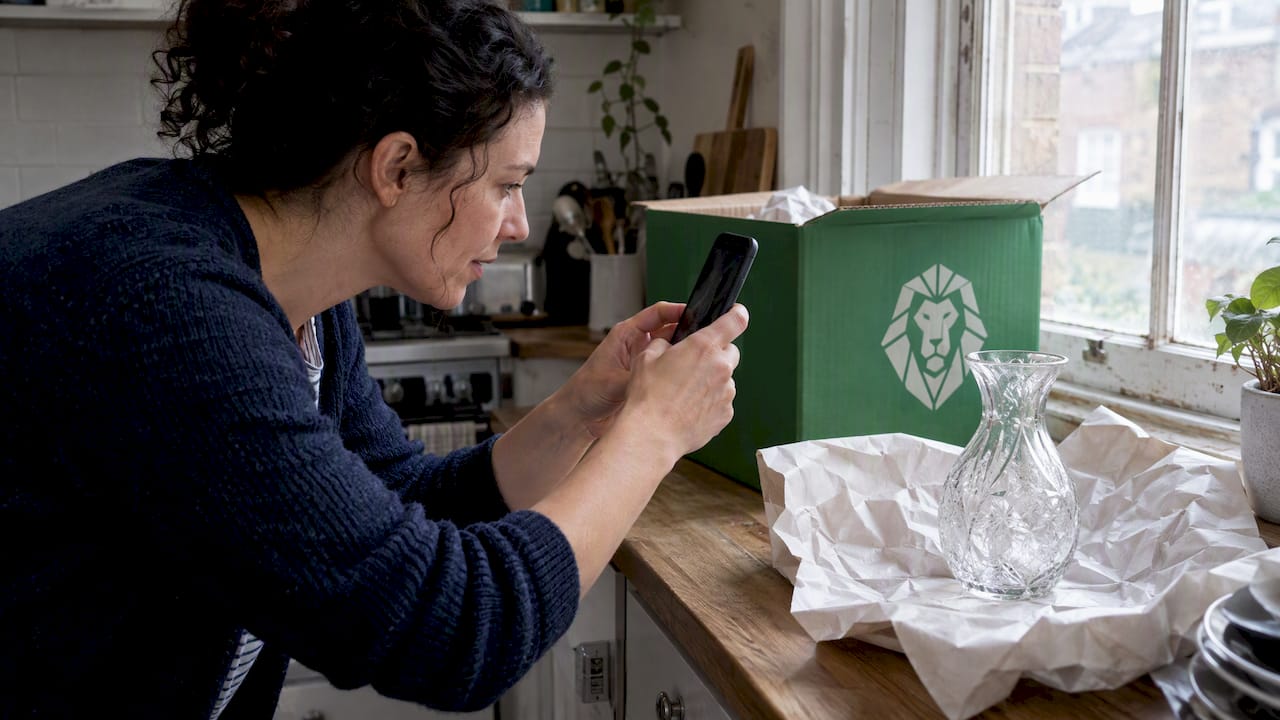
Think of each photo as a small piece of evidence. UK home-insurance guidance says photographs can support proof of ownership and condition, so frame every shot with that job in mind.
For each item that matters, take:
- A whole-item shot that shows the piece as it normally sits in your home.
- Close-ups of existing marks, scratches, chips and worn corners, so nobody argues later about what was already there.
- Labels and serial numbers, readable without zooming in.
- The item in situ, with a doorway or another piece of furniture in frame for scale.
- Box contents, photographed before you tape the box shut.
Photograph the extras too: original packaging, receipts, guarantee cards and instruction manuals if you still have them. They are often the quickest way to show what something cost.
Don’t forget the places people skip. Which? specifically warns against leaving out loft and garage contents, and the same goes for sheds, understairs cupboards and anything stored in a spare room.
Pro Tip: Shoot serial numbers and fragile items in natural light, close to a window, and avoid apps that heavily compress your pictures, so the small print stays legible.
How do you build a room-by-room photo inventory and item list? Part of removals inventory photos
You don’t need special software. A basic spreadsheet or a notes app on your phone does the job. The trick is to be consistent, so you can finish it in a couple of evenings rather than a stressful weekend.
- Pick a fixed room order and stick to it, for example hallway, living room, kitchen, bedrooms, bathroom, then loft, garage and shed.
- Name each room the same way in your list and your photo files, so nothing gets muddled later.
- Photograph first, then write the line. Take the pictures for one item, then add its entry straight away while the details are fresh.
- Record the same fields every time: item, count, condition and declared value.
- Pair each photo with its line by noting the file name next to the entry.
Once the basic list is done, split out anything high-value or fragile into its own short list:
- Antiques, pictures and artwork.
- Pianos and other large instruments.
- Electronics and anything with a serial number.
- Items that need dismantling or special packing.
Which? advises sending your mover details of pictures, antiques, pianos, large furniture and fragile goods before the quote is final. That matters because cover and liability can depend on declared values and packing arrangements.
Share the inventory when you ask for quotes. A removals company that knows about difficult access, a heavy wardrobe or a grand piano can price the job properly, and the cover you arrange will match what is actually in the van. Council inventory templates, such as this sample from Aberdeenshire, show the same room-by-room structure, so you are following a well-tested format.
How should you store, label and preserve your photos? Part of removals inventory photos
A great photo set is only useful if you can find it, and trust it, when something goes wrong. Keep it tidy from day one.
- Keep the original files. Where possible, preserve the original metadata, which records when the picture was taken. If you need to crop or edit, work on a copy.
- Use a simple naming scheme: room_item_date, for example kitchen_fridge_2026-03-14.
- Choose one home for everything: a single secure cloud folder, plus one backup elsewhere, such as an external drive.
- Add your paperwork. Scan or photograph receipts, valuations and guarantee cards and save them alongside the matching images.
Derbyshire Dales District Council suggests creating a removals folder for documents and receipts. We would extend that idea to a digital folder holding your photo set, inventory, quote, terms, declared values and any claim correspondence.
Pro Tip: Label the folder “Removals inventory” and note who holds the master copy, so there is never any doubt about which version is the real one.
How do photos help with insurance claims and your removals briefing? Part of removals inventory photos
Photos are strong evidence, but they are rarely the whole story. UK home-insurance guidance says insurers may also ask for receipts, valuations, instruction booklets, guarantee cards or bank statements. If the receipt is missing, bank statements, packaging and dated photographs can help fill the gap.
Here is how to make your photos work harder:
- Declare valuables separately. Policies often set single-item limits unless an item is listed on the schedule, as one insurer’s policy booklet explains.
- Get valuations for special pieces. Contents guidance from NFU Mutual recommends listing antiques, fine art and valuables separately and arranging professional valuations where needed.
- Brief your removers. The same inventory that supports a claim also tells your removals team what they are carrying.
If something does go wrong, insurer guidance is to report theft or vandalism to the police and keep damaged items for inspection. Then send your images and documents to the insurer.
Insurers don’t rely on photographs alone: UK guidance says they may also request receipts and valuations alongside them. So store those documents next to your pictures from the start.
What changes if you rent? Part of removals inventory photos
Tenants need two separate records, and mixing them up causes headaches at the end of a tenancy.
- Belongings photos are for your removals company and your contents insurance.
- Property condition photos are for deposit protection, and they follow council renter guidance on inventories.
On move-in, check the landlord’s inventory carefully. Photograph any damage that isn’t recorded, sign only when the list is accurate and keep a copy. At move-out the property is checked against that list, and repair or replacement costs may come out of your deposit. Keep the condition inventory in its own dated folder, separate from your “Removals inventory” folder.
When should you take your inventory photos? Part of removals inventory photos
Start early if you can. Derbyshire Dales District Council recommends beginning to organise a removal at least two months before the move, which gives you time to sort, declutter and photograph without rushing.
Four moments matter most:
- An initial sweep with photos of every room.
- An update after you sort and declutter.
- A final sweep just before packing starts.
- Sharing the finished inventory with your removers when you book.
Before packing starts, work through this list:
- Re-photograph anything you’ve moved, sold or re-packed.
- Check that every box you have photographed is labelled by room.
- Confirm your high-value list matches what you declared.
- Back up the folder to your second location.
- Send the latest version to your removals team and a family member.
For paperwork timing on the day itself, our removal day paperwork checklist is a handy companion, and our step-by-step guide to moving house in the UK covers the wider timetable.
Our view: a clear photo set saves everyone time, part of removals inventory photos
We handle large and fragile items, and a smooth move starts with clear information. A good photo inventory speeds up quotes and takes the guesswork out of claims. Two habits make the biggest difference. First, flag difficult access, such as tight stairs or a long carry, and send photos of it in advance. Second, tell us early about anything needing specialist handling, like a piano or an antique.
— Claudiu
How can we help with your move?
If you’d rather hand over the heavy lifting, our team handles house removals across the UK, including packing, unpacking and storage. Send us your photo inventory with your request and we can plan the job properly and talk you through declared cover. Request an instant quote today and attach your photo set.
FAQ
How many photos should a removals inventory have?
There is no fixed number. Photograph every item that matters, plus each room as a whole, and take extra close-ups of marks, labels and serial numbers. Fragile and high-value pieces deserve the most detail.
Do insurers accept photos on their own as proof?
Photos help, but insurers may also ask for receipts, valuations, guarantee cards or bank statements, according to UK home-insurance guidance. Keep those documents in the same folder as your images.
Should I photograph the loft and garage too?
Yes. Which? warns against leaving loft and garage contents off your inventory. Sheds and cupboards deserve the same treatment.
Where should I keep my photo inventory?
Use one secure cloud folder and a second backup, such as an external drive. Name it clearly, keep the original files and note who holds the master copy.
Do tenants need a separate inventory?
Yes. Keep your belongings photos separate from the property’s condition record, which protects your deposit. Council guidance recommends keeping the two apart.
Sources
- How to choose the best removals company – Which?
- Myhomeplus
- Moving house checklist – Derbyshire Dales District Council